5 tips for capturing stunning travel photos like a pro
Ready to gain the knowledge to get out there and take the most epic travel photos? First, you must get used to the idea that the best camera you have is the one in your hand. Whether that’s an iPhone, a $300 camera, or even a $10,000 camera setup, all have their uses and can bring in the results you want.
Having your camera ready is your best weapon in creating.
If you’ve ever found yourself staring at your travel photos and thinking, “Why don’t they look as amazing as the ones I see online?”—you’re not alone! I’ve been there too, and today, I’m sharing my top 5 tips for capturing stunning travel photos that’ll make your friends back home wish they were with you. Let’s dive in!

Note: this was shot at sunrise in the northern cascades National park.
Lighting is your forever best friend
There's a reason why the golden hour is called "golden"—because it's pure magic! The golden hour is the first hour after sunrise and the last hour before sunset when the light is soft, warm, and perfect for photos. The long shadows and golden tones add depth and beauty to your shots. All the dreamy photos you see on the internet are more often than not shot during the golden hour. Along with all the benefits it brings when shooting correctly, it allows you to properly expose your photo and is far more forgiving when you go to edit the finished product.
Now, don't get me wrong, there is definitely a time and place to shoot in harsh lighting environments. It’s either on purpose for a mood you’re going for in the photo or, at worst, in travel photography, it’s because you do not have a choice, or you miss the shot! There are plenty of times I’ve purposely shot backlit in the dead of day to get all the light rays and blowout effect. (I'll make sure to add examples of all the instances I mention.)
Pro Tips:
Set your alarm early and get out there for sunrise shots. Or, take a relaxing evening stroll to catch the sunset. You won’t regret it!
When it seems a little too dark to shoot, still try for the shot. Blue hour comes before golden hour in the morning and after in the evening. You’d be surprised how much information your cameras and photos can pick up that your eye cannot.
If shooting in harsh light, avoid shooting your subject backlit unless you can angle it so they are still in focus. Instead, find shade or indirect sunlight and start there.
Be patient, take more shots than you think you need, and play around with different times of day. Everyone has their sweet spot with the time of day and light where they feel they have the most control.

Note: this was shot at blue hour on a tripod in Bali, indonesia


2. Master your settings: Shutter Speed, ISO, and Aperture
Understanding your phone or camera’s settings can make a huge difference in your photos. If you have an iPhone 6 or newer, you can change the aperture and other settings to get closer to the desired photo.
This is for my camera users:
Shutter speed controls how long your camera’s sensor is exposed to light. A fast shutter speed freezes motion, while a slow shutter speed can create beautiful motion blur. Whether you’re shooting a still subject or a moving subject, knowing a range for your shutter speed plays a huge role in the success of your photo’s focus.
ISO determines your camera’s sensitivity to light. Lower ISO is ideal for bright conditions, and higher ISO is useful in low light. Think about turning on a light in a room with a dimmer switch. When it’s super bright, you probably don’t need to turn it up or on at all. As the day goes on and the light dissipates, you would turn the dimmer settings higher so the light brightens and you can see. However, the diminishing returns for using ISO are the quality of the photo goes down and “noise” (blurry dots) begins to appear. The more expensive the sensor you have, the more leeway you get with higher ISOs.
Aperture controls the depth of field. A wide aperture (small f-number) blurs the background, while a narrow aperture (large f-number) keeps more of the scene in focus. Think of a paper cone: when you tighten it, more of the environment becomes blurry, but when you loosen it, more comes into focus.
Pro Tips:
Practice adjusting these settings to see how they affect your photos. Try using Aperture Priority mode (A or Av on your camera) to experiment with depth of field, and Shutter Priority mode (S or Tv) for action shots.
Pick an object (a person or larger object is best) and shoot it at f/1.8, f/2.8, f/4, f/5.6, etc. Then compare. This is a great way to understand how aperture works. (You can do this on your iPhone as well; it might just have a higher starting aperture.)
Learning manual is an important lesson. I started with manual first and only recently began using other modes when it makes sense. There are times when auto modes can come in clutch, especially with moving subjects and constantly changing light, but mastering manual mode is going to teach you a lot about everything.
Remember bending the rules? Maybe you want your subject to be out of focus to tell a story. Or maybe you want your shutter speed to be super slow so the rushing water becomes smooth. These are things to think about.
By understanding these settings, you can take control of your camera and create stunning photos that truly capture the essence of your travels.


Find Unique subjects, Angles, and Perspectives
One of the biggest lessons I’ve learned in taking photos is the story you tell through them. Fun is a must, but being intentional is equally important. It can often be intimidating to get the shots you want when you feel limited by your environment. Taking a quick breath, mentally stepping away from the classic shot, and looking for something unique is the cornerstone of a good photo. Instead of snapping a photo from eye level, try shooting from different perspectives: crouch low, shoot from above, or find a creative frame. This makes your photos stand out and gives a fresh take on familiar sights.
The rule of thirds is a classic photography trick that can take your photos from good to great. Imagine your photo divided into nine equal parts by two horizontal and two vertical lines. Place your main subject along these lines or at their intersections for a balanced and visually pleasing shot. But remember, rules are meant to be bent and changed in scenarios like this. So get out there and do something different!
Pro Tips:
Don’t be afraid to get a bit adventurous. Lie on the ground, climb a viewpoint, or shoot through a plant to frame your shot. I’m always rolling around, standing awkwardly, and climbing sketchy things to get the shot just right. Your creativity is endless here.
Fail, fail, and fail again. Failure is a daily occurrence in photography. You may learn here how to take great travel photos, but there will always be bad ones in the mix. It’s part of the process.
No travel buddy? Who cares. Grab a tripod and use it. Most of my photos are shot by me in the same fashion.
Take more photos than you think you should. We’re in the digital age of photography, and whether you have an iPhone or a camera, you now have massive storage at your disposal to dump photos into. Out of the five shots of one pose, the best one may have been a millisecond or meter of difference that made it the one.
Most cameras and phones have a grid option to help you apply the rule of thirds. Turn it on and start experimenting!

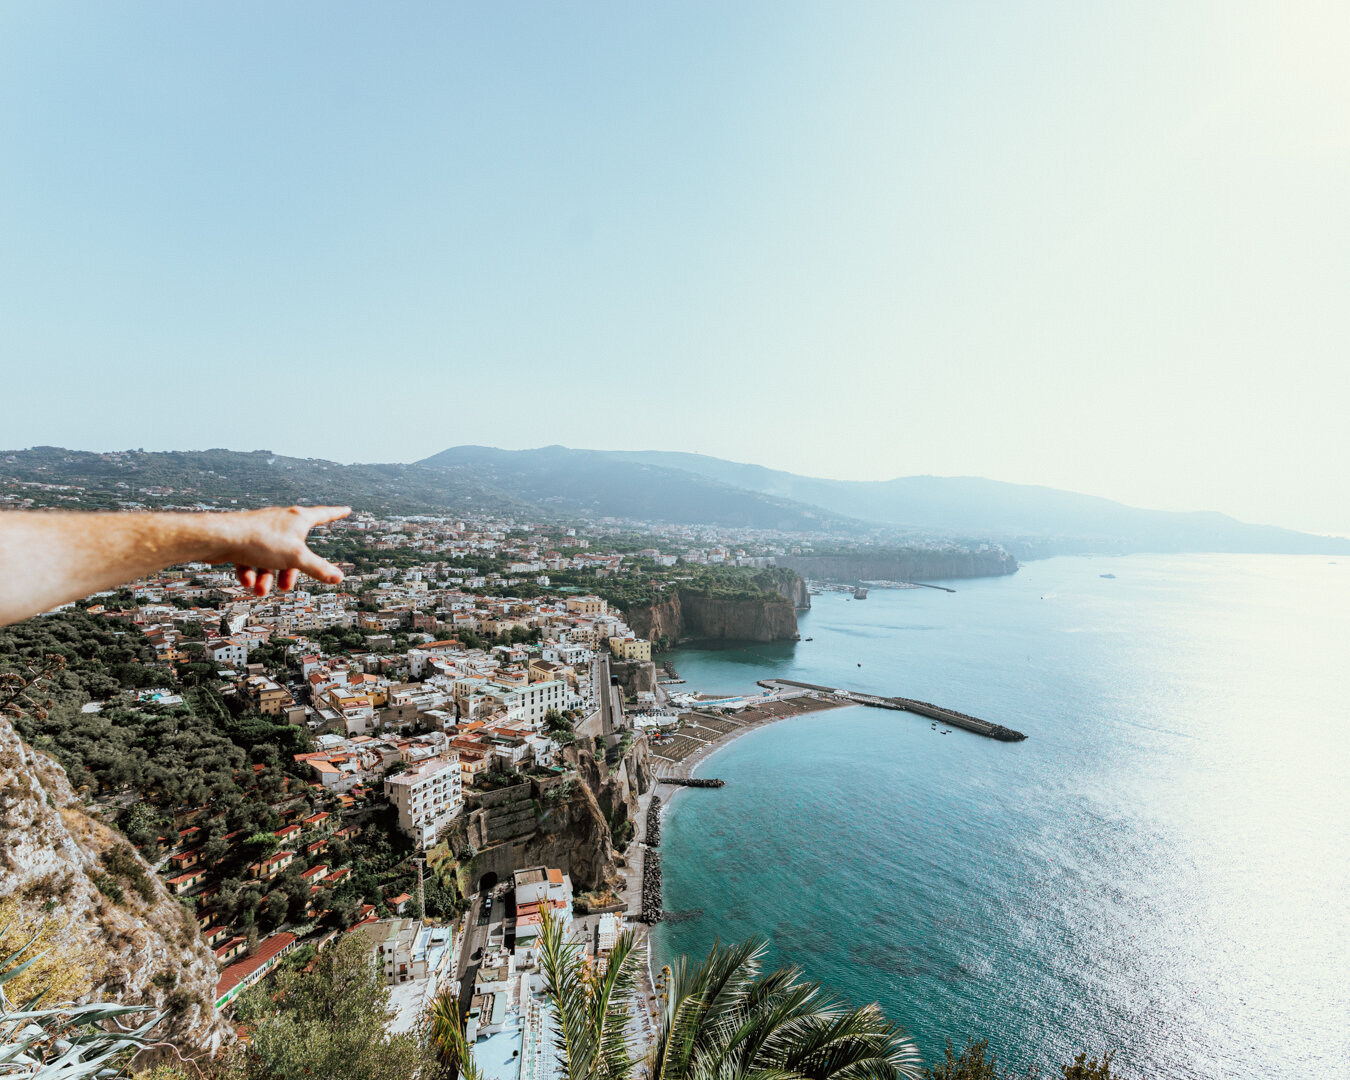
Note: This photo was taken with a wide-angle lens & Tripod by me in Bali, Indonesia

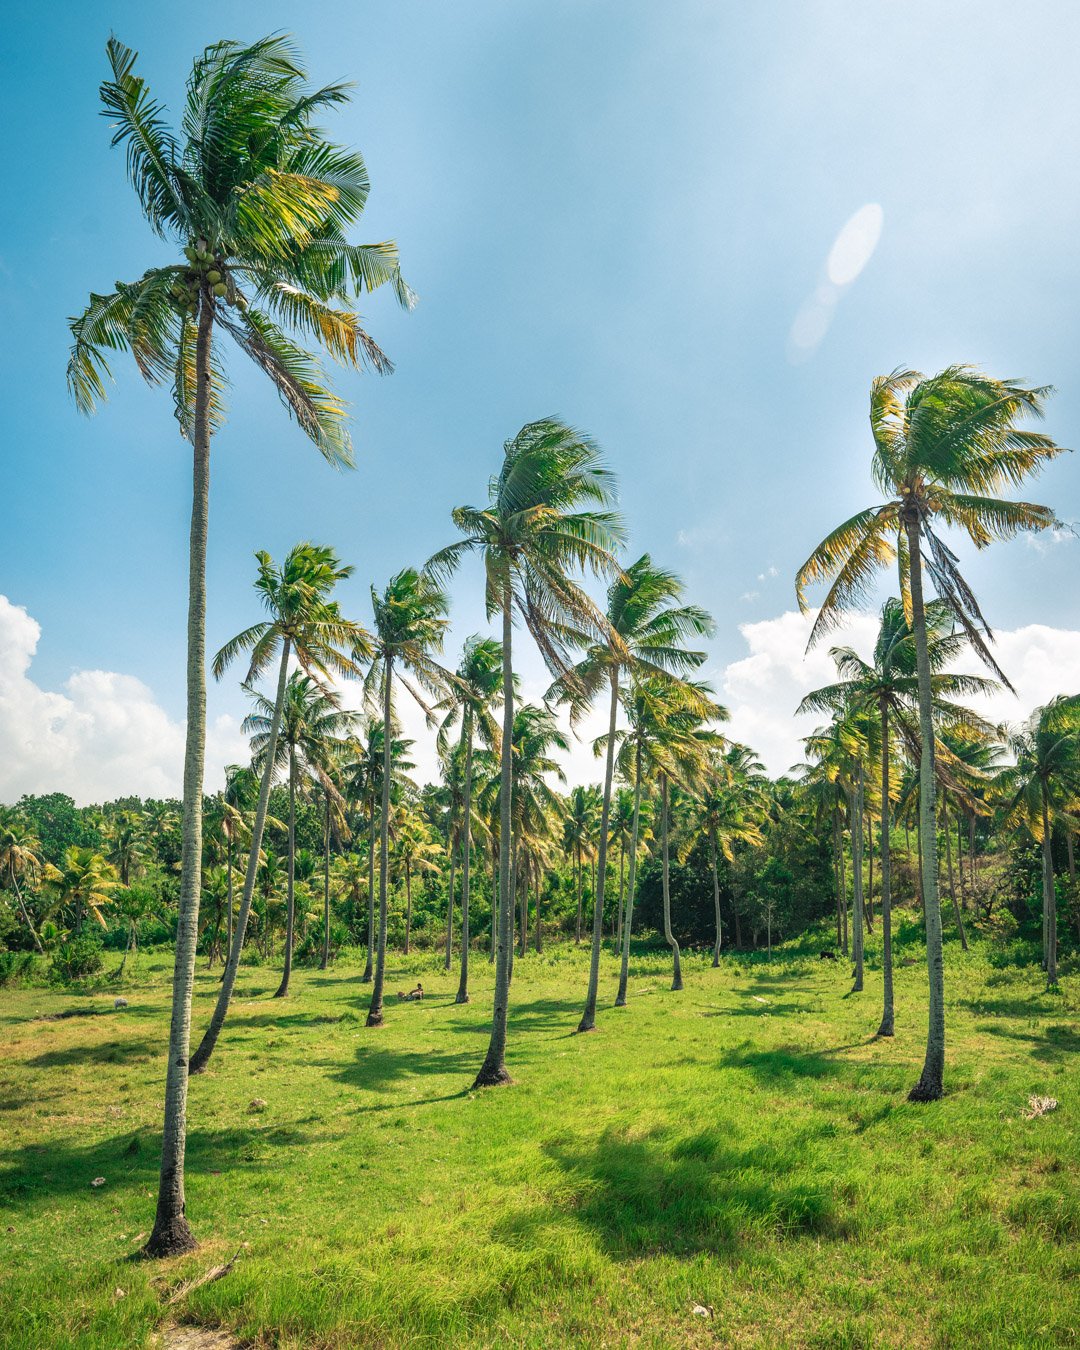
Note: This photo was taken with a wide-angle lens in Washington State.


4. Embrace the Local Culture & do your research
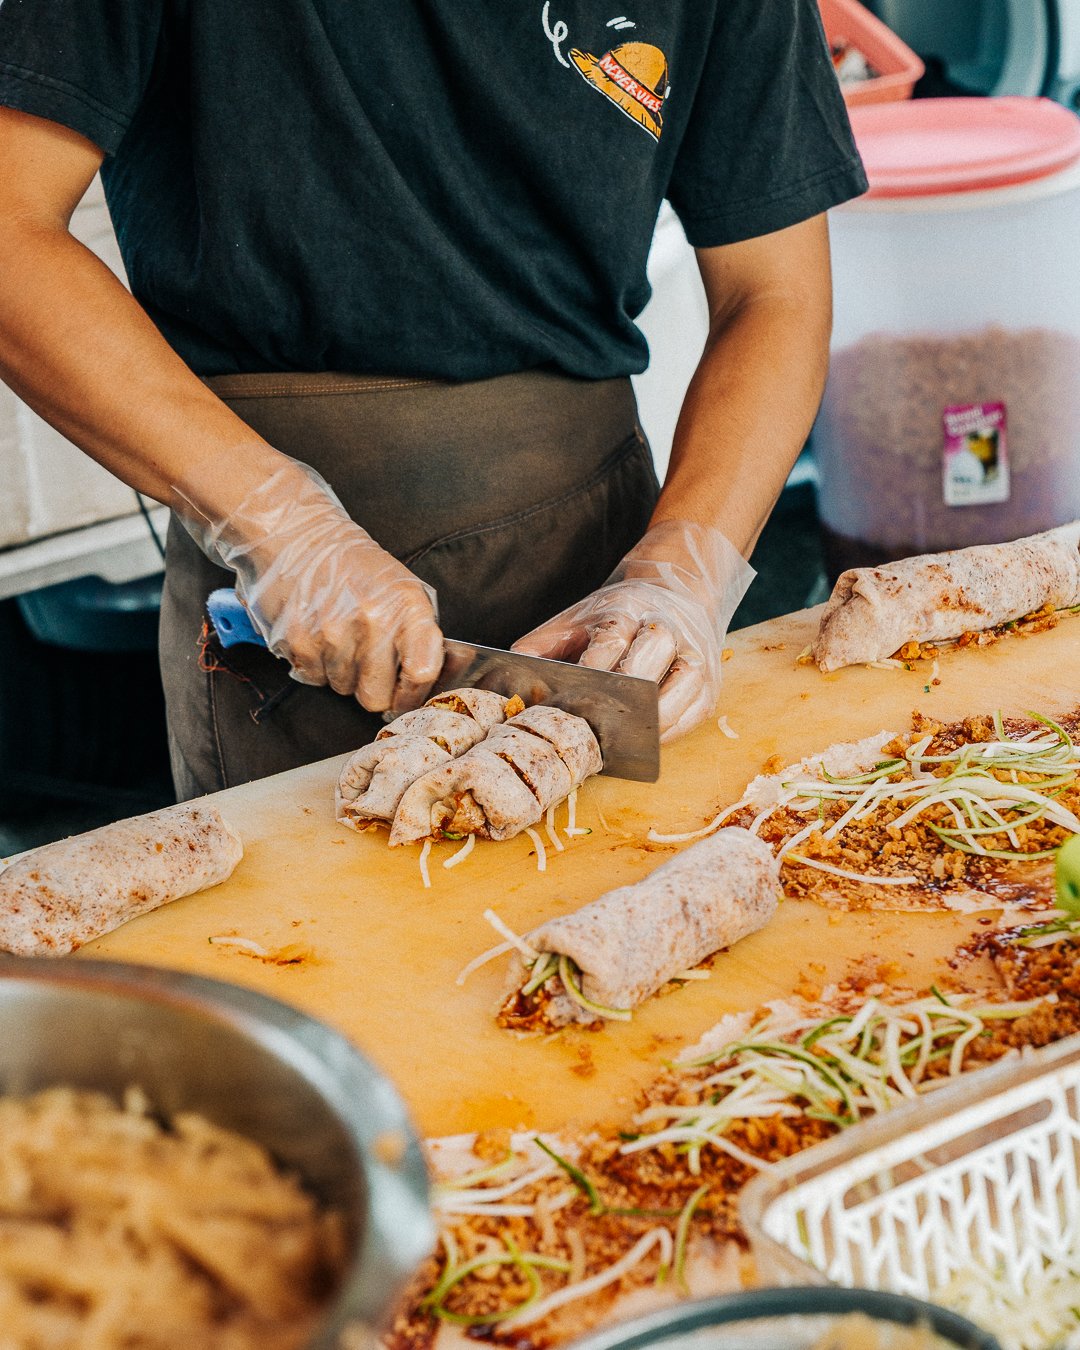
Capturing the essence of a place often means diving into the local culture. Snap photos of street markets, traditional dances, or local cuisine. These details tell the story of your travel experience and add authenticity to your photos. Remember, the daily life of locals will always tell a strong and enticing story of the adventure you’re capturing.
Doing your research can be a big part of the success of a photo. I often look at photos of a popular location and see what others have created. I check out the different details of the location and get creative in my head about what I imagine myself capturing there. Reading reviews will always give you an idea of the vibe of the location, its strengths, and its weaknesses.
As much as doing your research is important, allowing yourself to be in the moment and see what speaks to you is equally crucial. As your photography journey continues and you become more confident with your skills, style, and settings, this will become more apparent. You’ll have an idea of what you want but will wait until you get there and experience the moment for yourself.
Pro Tips:
Chat up the locals and ask them about interesting places or events going on in the area. You might stumble upon something amazing and photo-worthy!
Local friends are the best friends to have. They love sharing their culture with you, and many of my lifetime friends and memories have come from befriending locals and sharing stories.
Ask to take photos of strangers! Whether it’s a local or another tourist, the best practice is to capture new faces and environments. You get to learn, make someone’s day, and who knows—maybe make a friend!
Join one of my travel tour. I will teach you all the basics and bring you to all the hidden gems!


edit with authenticity in mind
Editing can enhance your photos, but less is more—your photos should reflect the true beauty of your travel experiences. As much as you may want to slap that fancy filter on all your epic new shots, a lot goes into getting the right look. Your style will grow and change as you learn to edit, and it can take years to find your unique touch, which is perfectly normal. I don't edit anywhere near how I used to.
Focus on adjusting the brightness, contrast, and sharpness to bring out the best in your images when you first start out. Purchasing or downloading your favorite influencers' presets can be a great start. You can see how they edit and tweak their settings to achieve their style. It’s up to you to decide what you love and dislike about it. Remember that presets from other photographers are a great learning tool and guide, but if you want to succeed, you need to develop your own style. There's nothing wrong with looking at bits and pieces of someone else’s style to inspire your own authenticity.
Pro Tips:
When first starting out, use free editing apps like VSCO or Lightroom Mobile for easy adjustments.
When you’re ready to take it seriously, consider Lightroom Classic and Photoshop on a computer to gain more tools and features.
Stay patient and constantly play with all the different sliders you have at your disposal.
Remember lighting? This plays a huge role in how the editing process will go. The better your original photo, the less you'll need to edit.


Bonus Tip: Have Fun and Be Spontaneous!
The most important tip of all? Have fun! The best travel photos come from genuine moments of joy and discovery. Don’t stress too much about getting the perfect shot—sometimes the best photos are the ones you didn’t plan.